
I follow A. Colwell on Twitter and loved her running announcement ticker/banner. When I looked up how to do it, I found a great video by The Techy Coach! A link to Audrey’s website is at the bottom of this post.

Here are instructions I’m making for myself for when I forget how to do this next year!
These instructions are what I wrote down for myself after watching The Techy Coach’s video. It is not exactly like he says to do it (oops).
- Create a new Google Slides presentation.
- Go to the top menu bar: FILE – Page Setup
- Change from (Standard) to: CUSTOM
- Enter (size) – example: 10 x 1 – I messed w this further in the HTML after mine was finished (width 700, height 125) see HTML below
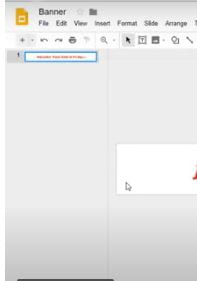
- Type your message
- Click TRANSITION button on top menu bar.
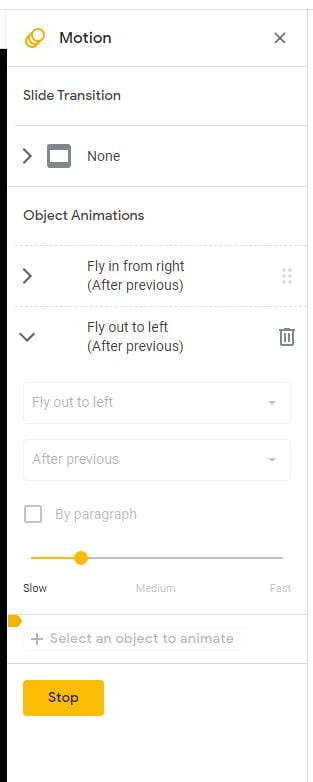
- Select text box – click ADD ANIMATION
- Add first animation: FLY IN FROM RIGHT (change to WITH PREVIOUS) – use slider to slow down (the one above I didn’t do correctly because mine is ‘AFTER previous’) oops 🙂
- Add second animation: OUT TO LEFT (change to AFTER PREVIOUS) – use slider to slow down (move it almost all the way to the left)
10. Click PLAY to test your animations
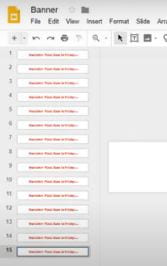
11. Now go to your side view in the left panel and right click- COPY
12. Paste it about 10 more times (CTRL-V)
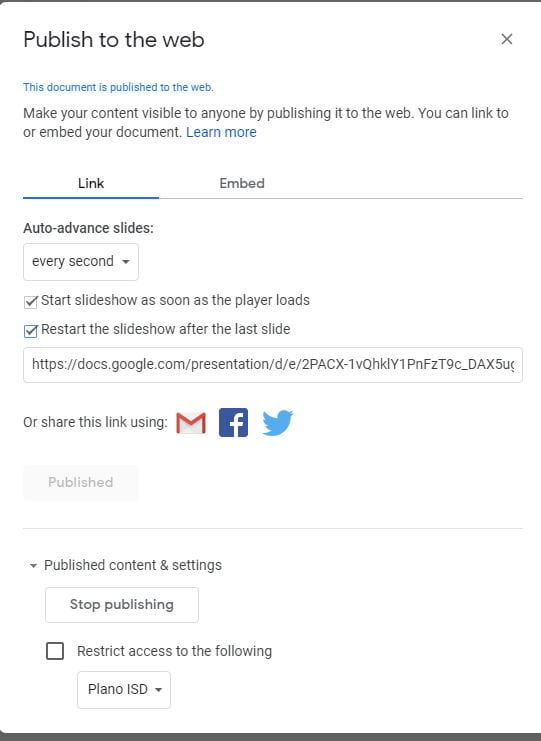
13. Choose FILE: Publish to the Web and adjust the settings as follows-
This is so it will “automatically launch in kiosk mode” (The Techy Coach).
14. I further adjusted the HTML to change the size parameters a bit for mine because it looked weird with the font I chose:
15. Copy the embed code and paste it into your site. Edublogs (add media button), Insert Embed Code, (add <center> first in the HTML), and paste, SAVE
(Google Sites)- Embed from Web button, check Preview, INSERT, resize box, center, adjust within frame, PUBLISH (from the Techy Coach)
Here are the video instructions from The Techy Coach
Also check out Audrey Colwell’s (McKinney ISD) Slaughter Elementary Learning Commons page! This is where I saw the ticker idea!